
schumacher built 4 charging manual
Schumacher Built-In 4-Amp Battery Charger Manual: A Comprehensive Guide
This manual is your guide to successfully operating your new Schumacher charger, removing guesswork from battery maintenance and ensuring optimal performance for various battery types.
Welcome to the world of reliable battery charging! This Schumacher Built-In 4-Amp Charger is designed to provide a convenient and efficient solution for maintaining and restoring the power of your lead-acid, AGM, and gel batteries. Automatic battery chargers, like this model, simplify the process, eliminating much of the uncertainty often associated with manual charging methods.
Whether you’re a seasoned mechanic or a first-time user, this charger offers a straightforward approach to keeping your batteries in peak condition. It’s an awesome tool for any shop or garage, ensuring you always have a fully charged battery ready to go. This manual will guide you through each step, from initial setup to troubleshooting, helping you maximize the charger’s capabilities and enjoy years of dependable service. Congratulations on your purchase and let’s begin your journey!
Understanding Battery Charging Basics

Battery charging is fundamentally about restoring electrical energy that has been depleted during use. Batteries rely on chemical reactions to store and release power; discharging occurs as these reactions progress, and charging reverses them. A charger supplies a direct current (DC) voltage higher than the battery’s voltage, forcing electrons to flow back into the battery, replenishing the stored energy.
Different battery types – lead-acid, AGM, and gel – have unique charging requirements. Understanding these differences is crucial for optimal performance and longevity. Overcharging can damage batteries, while undercharging leaves them with insufficient capacity. Modern chargers, like the Schumacher 4-Amp model, often feature automatic modes that adjust charging parameters based on battery type and condition, simplifying the process and protecting your investment. Proper charging ensures reliable starting power and extends battery lifespan.

Safety Precautions
Prioritizing safety is paramount when working with battery chargers and batteries. Batteries contain corrosive acid and can produce explosive gases during charging. Always work in a well-ventilated area to prevent gas buildup. Wear appropriate personal protective equipment (PPE), including safety glasses and gloves, to shield your eyes and skin from potential hazards.
Never charge a damaged battery – inspect for cracks or leaks before connecting the charger. Ensure the charger is disconnected from the power source before making or breaking connections to the battery. Avoid short-circuiting the terminals with metal objects. Keep flammable materials away from the charging area. Improper use can lead to fire, explosion, or personal injury. Refer to the battery manufacturer’s safety guidelines for specific recommendations; Following these precautions ensures a safe charging experience.
Charger Features and Specifications
The Schumacher Built-In 4-Amp Battery Charger is designed for convenient and reliable battery maintenance. Key features include a built-in design for portability and ease of use, and a 4-amp charging rate suitable for a variety of battery sizes. It supports both 6-volt and 12-volt battery systems, offering versatility for automotive, marine, and other applications.
This charger incorporates automatic and manual modes, allowing users to select the optimal charging cycle. It’s compatible with lead-acid, AGM, and gel batteries. Specifications include an input voltage of 120V AC, and a charging current of 4 amps. The unit features LED indicators to display charging status and potential issues. Its robust construction ensures durability, making it a dependable tool for both professional and DIY users. This charger simplifies battery care, extending battery life and performance.
Voltage Settings (6V & 12V)
The Schumacher 4-Amp charger offers selectable voltage settings to accommodate a wide range of battery types and vehicles. A crucial step before initiating any charge is verifying the battery’s voltage requirement – either 6-volt or 12-volt. Incorrect voltage selection can lead to undercharging or, more seriously, damage to the battery.
The charger features a clearly marked selector switch allowing you to choose the appropriate voltage. For most modern automotive batteries, the 12-volt setting is standard. However, older vehicles, motorcycles, or specific power equipment may utilize 6-volt systems. Always consult your battery’s documentation or the vehicle’s manual to confirm the correct voltage. Proper voltage selection ensures efficient charging and maximizes battery lifespan. Double-checking this setting before connecting the clamps is paramount for safe and effective operation.
Amperage Output (4-Amp)
The Schumacher Built-In 4-Amp Battery Charger delivers a consistent 4-amp charging current. This amperage level is ideal for a variety of battery sizes commonly found in cars, motorcycles, boats, and small power equipment. While a higher amperage might seem faster, a 4-amp charge provides a controlled and safe rate, minimizing the risk of overcharging and potential battery damage.
This output is particularly well-suited for maintaining smaller batteries or trickle-charging larger ones over extended periods. It’s a versatile setting for both initial charging and long-term battery maintenance. The 4-amp output allows for a balance between charging speed and battery health. Remember that charging time will vary depending on the battery’s initial state of discharge and its overall capacity. Utilizing the correct amperage ensures optimal charging performance and prolongs the life of your battery.
Automatic/Manual Mode Selection
The Schumacher 4-Amp charger offers both Automatic and Manual modes, providing flexibility for different charging needs; Automatic mode simplifies the process; the charger intelligently cycles between charge stages, switching to a maintenance or float charge once the battery is full. This “set it and forget it” functionality is perfect for routine maintenance and preventing overcharging.
Manual mode, however, grants the user greater control. This is beneficial for batteries with specific charging requirements or when you want to closely monitor the charging process. Selecting manual mode allows you to oversee the charging stages and intervene if necessary. Understanding when to use each mode is crucial for maximizing battery life and ensuring safe operation. The charger’s design prioritizes user convenience while still offering the precision needed for optimal battery care, making it a versatile tool for any workshop.
Setting Up the Charger for Operation
Before initiating the charging process, proper setup is paramount for both safety and efficiency. Begin by ensuring the charger is placed on a stable, dry surface, away from flammable materials. Inspect the AC power cord for any damage – do not use if frayed or compromised. Next, verify the correct voltage setting (6V or 12V) is selected, matching your battery’s requirements. Incorrect voltage can severely damage the battery.
Confirm the chosen charging mode (Automatic or Manual) aligns with your needs. Double-check the polarity of the battery terminals before connecting the clamps; reversing polarity can cause sparks and potential harm. A well-prepared setup minimizes risks and optimizes the charging cycle, contributing to a longer battery lifespan and a safer working environment. Always prioritize a methodical approach to ensure a smooth and successful charging experience.
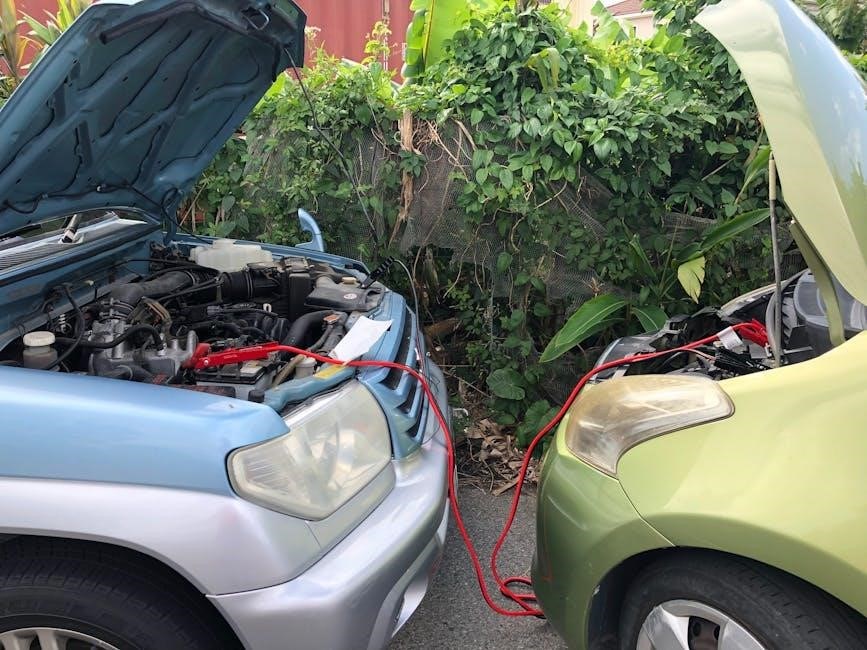
Connecting to the Battery (Positive & Negative Terminals)
Correct polarity is absolutely crucial when connecting a battery charger. Always begin by identifying the positive (+) and negative (-) terminals on both the charger and the battery. Typically, the positive terminal is marked with a “+” symbol and is often red, while the negative terminal is marked with a “-” symbol and is usually black.
Attach the red clamp to the positive terminal of the battery, and the black clamp to the negative terminal. Ensure a firm, secure connection to establish good electrical contact. Avoid allowing the clamps to touch each other or any metallic parts of the vehicle. Sparks can occur if there’s a short circuit. Once connected, double-check the connections before initiating the charging process. Incorrect polarity can cause irreversible damage to the battery and potentially the charger itself, voiding any warranty.
Charging Different Battery Types
The Schumacher 4-Amp charger is versatile, capable of charging several battery types, but understanding each type’s specific needs is vital for optimal results and longevity. Lead-acid batteries, commonly found in vehicles, are the most frequently charged and generally benefit from a slower, more controlled charge. AGM (Absorbent Glass Mat) and Gel batteries, often used in powersports and marine applications, require a slightly different approach.
These valve-regulated lead-acid (VRLA) batteries are sensitive to overcharging. While the 4-Amp charger can handle these types, selecting the appropriate voltage and potentially utilizing a manual mode for closer monitoring is recommended. Always consult the battery manufacturer’s specifications for recommended charging parameters. Using the incorrect settings can reduce battery life or even cause damage. Proper charging ensures peak performance and extends the lifespan of your batteries.

Lead-Acid Battery Charging
Lead-acid batteries are the most common type and readily charged with the Schumacher 4-Amp charger. Begin by ensuring the battery is in a well-ventilated area, as charging produces hydrogen gas. Select the appropriate voltage – 6V or 12V – matching the battery’s specification. For most automotive batteries, 12V is the correct setting. Connect the clamps securely, red to positive (+) and black to negative (-).
The charger’s automatic mode is suitable for many lead-acid batteries, initiating a charge and then switching to a float or maintenance mode once fully charged. However, for deeply discharged batteries, a manual charge may be beneficial, allowing for a more controlled initial charge. Monitor the charging lights to gauge progress. Avoid overcharging, as it can damage the battery. Regular charging helps maintain lead-acid battery health and extends its lifespan.
AGM Battery Charging
Absorbent Glass Mat (AGM) batteries require a slightly different charging approach than traditional lead-acid. The Schumacher 4-Amp charger can safely charge AGM batteries, but it’s crucial to select the correct voltage – typically 12V for most applications. AGM batteries are sealed and don’t require the same ventilation considerations as flooded lead-acid types.
While automatic mode often works well, some AGM batteries benefit from a slightly lower charging voltage. Check the battery manufacturer’s recommendations. Overcharging AGM batteries can lead to gassing and reduced lifespan. Monitor the charging process closely, and avoid prolonged charging at a high amperage. A slower, controlled charge is generally preferred for AGM batteries. Using the correct settings ensures optimal performance and longevity for your AGM power source.
Gel Battery Charging
Gel batteries, like AGM batteries, are a type of sealed lead-acid battery, but they utilize a gelled electrolyte. This makes them particularly sensitive to overcharging. When using the Schumacher 4-Amp charger with gel batteries, always adhere to the battery manufacturer’s specified charging voltage – typically 12V.
It is highly recommended to use the manual mode and closely monitor the charging process. Gel batteries generally require a lower charging voltage than traditional lead-acid batteries to prevent gassing and damage to the gelled electrolyte. Avoid using automatic mode, as it may deliver too high a voltage. A slow, controlled charge is essential for maximizing the lifespan and performance of gel batteries. Overcharging can irreversibly damage these batteries, so caution is paramount.
Charging Process & Indicators
The Schumacher 4-Amp charger utilizes a series of indicator lights to communicate the charging status. Initially, the “Charge” light will illuminate, signifying that the charging cycle has begun and the battery is receiving current. As the battery approaches full charge, the “Charge” light may fluctuate, indicating the charger is transitioning to a maintenance or float mode.
A solid “Full Charge” light indicates the battery has reached its optimal charge level and the charger will maintain that level. Some models may also feature a “Reverse Polarity” light, which illuminates if the clamps are connected incorrectly – immediately disconnect and reverse the connections. Regularly observe these indicators throughout the charging process to ensure proper operation and prevent potential issues. Understanding these signals is crucial for safe and effective battery charging.
Understanding the Charging Lights
The Schumacher 4-Amp charger employs a color-coded light system for clear status indication. A steady red “Charge” light confirms the charging process is actively underway, delivering power to the battery. A flashing red light often signals a detected issue, such as reverse polarity or a faulty battery – immediate attention is required.
When the battery reaches full capacity, the light typically shifts to green, indicating a completed charge and transition to maintenance mode. Some models include a yellow light for diagnostic purposes, potentially indicating a low voltage or a battery nearing the end of its lifespan. Always consult the specific model’s documentation for precise interpretations of each light’s meaning. Paying close attention to these indicators ensures safe and efficient battery maintenance.
Monitoring Battery Voltage
Regularly monitoring battery voltage is crucial for assessing its health and charge level. While the Schumacher 4-Amp charger doesn’t always display voltage directly, using a separate multimeter provides valuable insights. A fully charged 12-volt lead-acid battery should read around 12.6 volts or higher. Readings below 12.4 volts suggest a partial charge, while 12.0 volts or lower indicates a significantly discharged battery.
For 6-volt systems, a fully charged battery should measure approximately 6.3 volts. Consistent low voltage readings, even after charging, may signify a failing battery requiring replacement. Monitoring voltage helps prevent overcharging, which can damage the battery, and ensures optimal performance of the connected devices. Remember to disconnect the charger before taking voltage readings with a multimeter for safety.
Troubleshooting Common Issues
Encountering issues with your Schumacher 4-Amp charger is sometimes unavoidable. If the charger fails to power on, first verify the AC power source and ensure the power cord is securely connected. A blown fuse within the charger itself could also be the culprit – consult the warranty section for replacement instructions. If the battery isn’t charging, double-check the polarity of the connections (red to positive, black to negative).
Overheating can occur with prolonged use or inadequate ventilation; allow the charger to cool down before resuming operation. If issues persist, inspect the charging cables for damage. Remember, a failing battery can sometimes appear as a charger malfunction. Always rule out battery issues before assuming a charger defect. If problems continue, contact Schumacher support for assistance.

Charger Not Turning On
If your Schumacher 4-Amp charger isn’t powering on, several simple checks can resolve the issue. Begin by verifying the AC power supply – ensure the charger is plugged into a functioning outlet. Test the outlet with another device to confirm it’s delivering power. Next, inspect the power cord for any visible damage, such as cuts or frayed wires. A damaged cord must be replaced.
Many Schumacher chargers have an internal fuse to protect against power surges. If the outlet and cord are fine, a blown fuse is a likely cause; Refer to the warranty information and maintenance section for instructions on locating and replacing the fuse. Finally, ensure any automatic safety shut-off features haven’t been triggered – a reset might be necessary. If these steps don’t resolve the problem, contact Schumacher support.
Battery Not Charging
If the Schumacher 4-Amp charger powers on but the battery isn’t receiving a charge, begin by double-checking the connections. Ensure the positive (red) clamp is firmly attached to the positive terminal of the battery, and the negative (black) clamp to the negative terminal. Poor connections are a common culprit.
Verify the charger’s voltage setting matches the battery’s voltage (6V or 12V). An incorrect setting will prevent proper charging. Also, confirm the battery isn’t already fully charged – the charger’s indicator lights should provide this information. If the battery is severely discharged or sulfated, it may take a longer time to register a charge. Try a different battery to rule out a battery-specific issue. If problems persist, consult the troubleshooting section for further assistance or contact Schumacher support.
Overheating Issues
If your Schumacher 4-Amp charger becomes excessively hot during operation, immediately disconnect it from the power source and the battery. Overheating indicates a potential problem that requires attention to prevent damage to the charger or the battery, and to avoid safety hazards.
Ensure the charger has adequate ventilation. Do not operate it in a confined space or cover it with any materials. Check the charger’s vents for obstructions like dust or debris, and clean them if necessary. Prolonged charging of a fully charged battery can also cause overheating; the automatic mode is designed to prevent this. If overheating continues even with proper ventilation and usage, discontinue use and contact Schumacher customer support for assistance. Do not attempt to disassemble or repair the charger yourself.
Maintenance and Care
To ensure the longevity and optimal performance of your Schumacher 4-Amp battery charger, regular maintenance is recommended. Periodically inspect the charger’s cord for any signs of damage, such as fraying or exposed wires. If damage is detected, discontinue use immediately and replace the cord. Keep the charger clean by wiping it down with a damp cloth; avoid using harsh chemicals or abrasive cleaners.
Ensure the charger’s cooling vents are free from dust and debris to maintain proper ventilation. After each use, allow the charger to cool down completely before storing it. Store the charger in a cool, dry place, away from direct sunlight and extreme temperatures. Following these simple maintenance steps will help keep your Schumacher charger in excellent working condition for years to come, providing reliable battery charging whenever you need it.
Cleaning the Charger
Maintaining a clean Schumacher 4-Amp battery charger is crucial for optimal performance and longevity. Before cleaning, always disconnect the charger from the power outlet to prevent electrical shock. Use a slightly damp cloth to wipe down the exterior casing, removing any dust, dirt, or grime that may have accumulated during use.
Avoid using harsh chemicals, solvents, or abrasive cleaners, as these can damage the plastic housing and internal components. Pay particular attention to the cooling vents, ensuring they are free from obstructions to allow for proper airflow. A soft brush can be used to gently remove any debris from the vents. After cleaning, allow the charger to dry completely before reconnecting it to the power outlet and resuming operation. Regular cleaning will help keep your charger functioning efficiently and safely.
Storage Guidelines
Proper storage of your Schumacher 4-Amp battery charger is essential to maintain its functionality and extend its lifespan. Before storing, ensure the charger is completely clean and dry, following the cleaning instructions outlined previously. Store the charger in a cool, dry environment, away from direct sunlight, extreme temperatures, and moisture.
Avoid storing the charger in areas where it could be exposed to dust, dirt, or corrosive fumes. Ideally, store it in its original packaging or a protective case to prevent physical damage. Keep the charging cables neatly coiled and stored alongside the charger. Regularly inspect the charger during storage for any signs of damage or deterioration. Following these guidelines will ensure your Schumacher charger remains in excellent condition and ready for use whenever you need it.
Warranty Information
Schumacher offers a warranty on the Built-In 4-Amp Battery Charger, protecting against defects in materials and workmanship. The standard warranty period is typically one year from the date of original purchase, but may vary depending on the retailer and region. To make a warranty claim, you will need to provide proof of purchase, such as a receipt or invoice.
The warranty covers repair or replacement of the charger at Schumacher’s discretion. It does not cover damage caused by misuse, abuse, neglect, accidents, unauthorized modifications, or normal wear and tear. For complete warranty details, including specific terms and conditions, please refer to the warranty card included with your charger or visit the Schumacher website. Contact Schumacher customer support for assistance with warranty claims and to initiate the repair or replacement process.
Schumacher Support & Resources
Schumacher provides a wealth of support resources to assist you with your Built-In 4-Amp Battery Charger. Their official website, www.schumacherelectric.com, is a central hub for information, including downloadable manuals, FAQs, and troubleshooting guides. You can also find helpful videos demonstrating proper charger operation and maintenance.
For direct assistance, Schumacher offers customer support via phone and email. Contact information is readily available on their website. Additionally, many online forums and communities dedicated to automotive repair and battery maintenance can provide valuable insights and peer-to-peer support. Don’t hesitate to leverage these resources if you encounter any issues or have questions about your charger. Schumacher is committed to ensuring a positive user experience and providing the assistance you need.
Frequently Asked Questions (FAQ)
Q: Can I use this charger on any type of 12V battery? A: Yes, it’s suitable for lead-acid, AGM, and gel batteries. However, always refer to the battery manufacturer’s recommendations.
Q: What do the charging lights indicate? A: Typically, red indicates charging, yellow signifies a trickle charge, and green means the battery is fully charged. Consult the “Charging Process & Indicators” section for specifics.
Q: My charger isn’t turning on. What should I do? A: Ensure the charger is properly plugged into a working outlet and the battery connections are secure. See the “Troubleshooting” section for more detailed steps.
Q: Is this charger fully automatic? A: Yes, it features automatic operation, but manual mode selection is also available for customized charging.
Q: How do I clean the charger? A: Disconnect it from power and wipe the exterior with a damp cloth. Avoid getting water inside.